What I mean is not that I was abducted, as far as I’m aware. But how I rediscover my love to this subject, a love some time forgotten, and all for doing this illustration.
So, if you came looking to find information about UFO phenomena, I’m sorry to disappoint you. However, what if I talk about the creation of a 3D illustration that honor the topic instead, with some vintage and my personal style touch?
Would you like that?
If so, then allow me to talk about a recent rendering I made.
Rendering? You might ask.
Yes, rendering, in terms of 3D graphics, the phase when you say to the computer what to do and how to produce the final result of your scene.
For those who don’t know about the 3D process, allow me to explain in a few words.
The informal explanation of 3D art process (My way).
When an artist want to create a visual idea in 3D, doesn’t matter if a product or a personal concept art, the process can summaries in three main phases: construction, embellishment and the output computation. Of course, the previous over simplify the real process. Bear with me, I just try to make it easier for readers that don’t know anything about it.
In construction, the artist build the models in 3D space, like a sculptor but using a computer. Here, the artist either start from scratch to create a unique concept, or use previously created models for fast production or a combination of both. After all, why modeling a truck again if you can purchase or download one from the Internet? Exactly.
In embellishment phase, the artist assign colors, materials, and lights to the scene. Here you can use textures or add surface features to a 3D model so that that model appears as metallic, plastic, liquid and so on. Creating materials (also called shaders) requires either technical skills and artistic taste.
Then, the lights. I believe you can’t cheat at this step. Either you learn to light like a pro, or your scene is doom. At this phase, you can enhance or ruin your scene. Believe me, I did it, several times, and maybe I still do. You tell me. I mean it, tell me!
Maybe I should add a fourth step. I talk about the process of camera set-up and layout. I thought it could embed within embellishment. Never mind. With camera, and layout, you direct the eye of the viewer to a main point of interest. Became good at this means you can tell a story with one image.
OK, what do you mean with that? (you may ask again). I talk about the process of directing how your camera see the scene, and how you arrange all the elements in it. This step requires a good cinematography, or photography eye to end with a pleasant-to-the-eye results.
You can direct the eye of the viewer using light, though. A good photographer does that all the time.
One more step…
The output. And with that I don’t mean pushing the button. Well, yes, you push the button, but not just one button. At this stage, the artist input all the parameters (depending on the software and computer power available) so that the computer (or several computers) know what to do when you push the button “Render”.
For this final stage, artist need to have some technical knowledge about the rendering program in use. Otherwise, it simply won’t give you the desired results, and in must cases frustrate you (like me at early days in my career, LOL).
OK, here you have it. I couldn’t come to an easier way to explain it, and I broke my promise of “few words”.
On the other hand, I could elaborate more on this topic like, forever, because I love the subject and love to talk about it. But I won’t do that to you, not now at least. Maybe on another time.
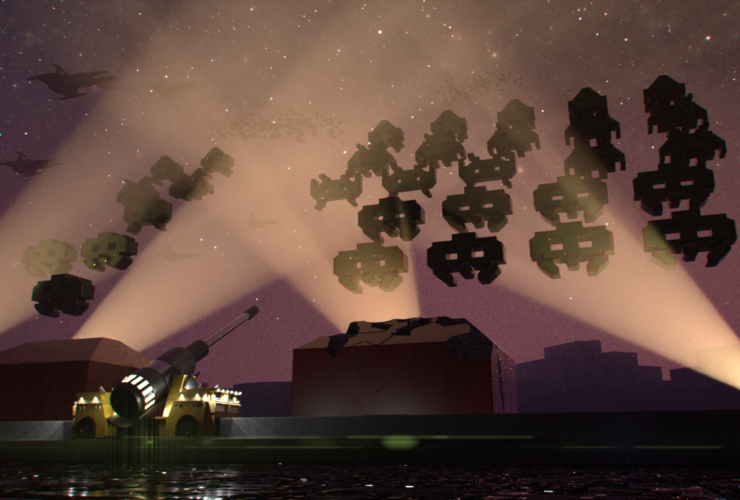
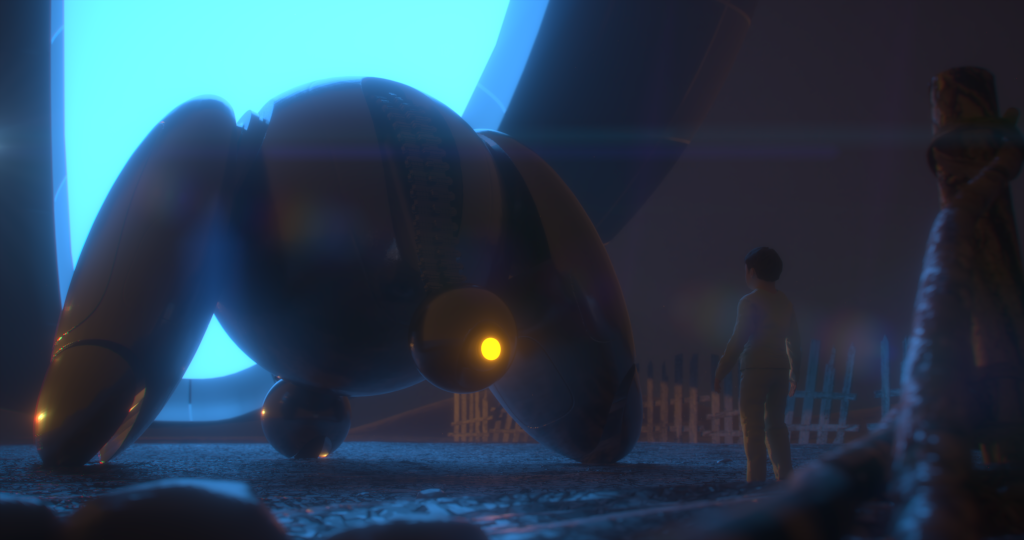
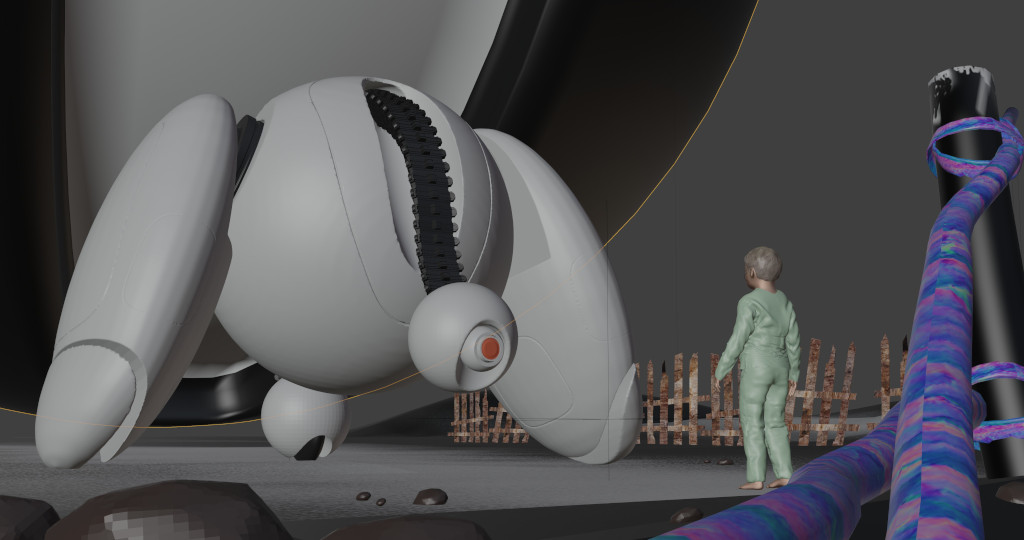
The Illustration “Encounter”
So, what about it?
When I create this idea, I spent little to no time in sketching, because I just wanted to experiment with the rendering software.
As a main theme I choose, you guess it, extra-terrestrial encounter. So, you can deduct the genius title I put to this piece, “Encounter”. Genius, right? LOL, I couldn’t imagine a better cliché, easier title. Lazy me!
I must confess that I love the E.T. topic and might torment the world by producing more work about it. Sorry world! It’s an ET thing!
So, since the goal here target to testing and experimenting, I didn’t spend too much time in the modeling either. For that reason, all the shapes in robot character and spaceship remain simple (spheres) and the rest, the props and the kid character, came from my library. This way I could focus on layout, materials, and render.
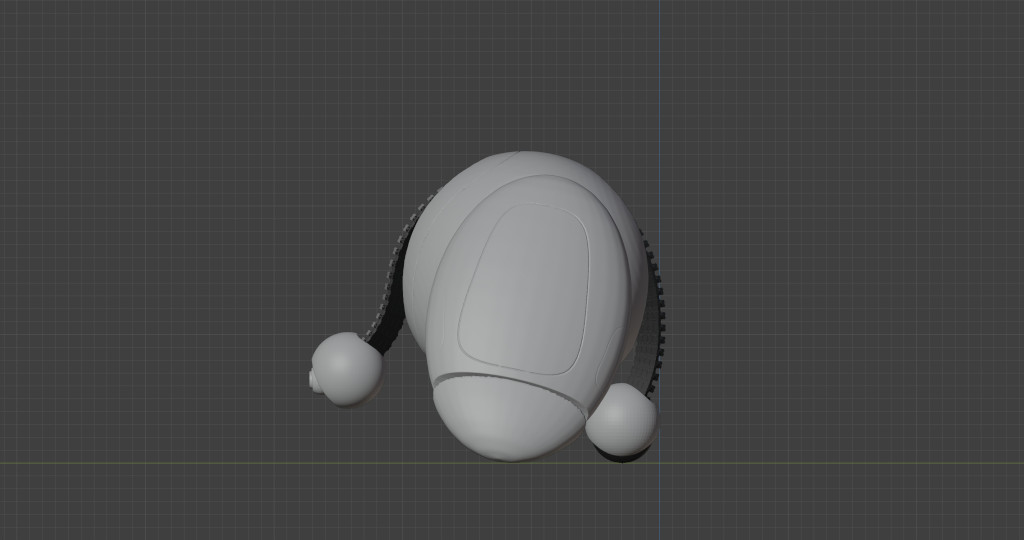
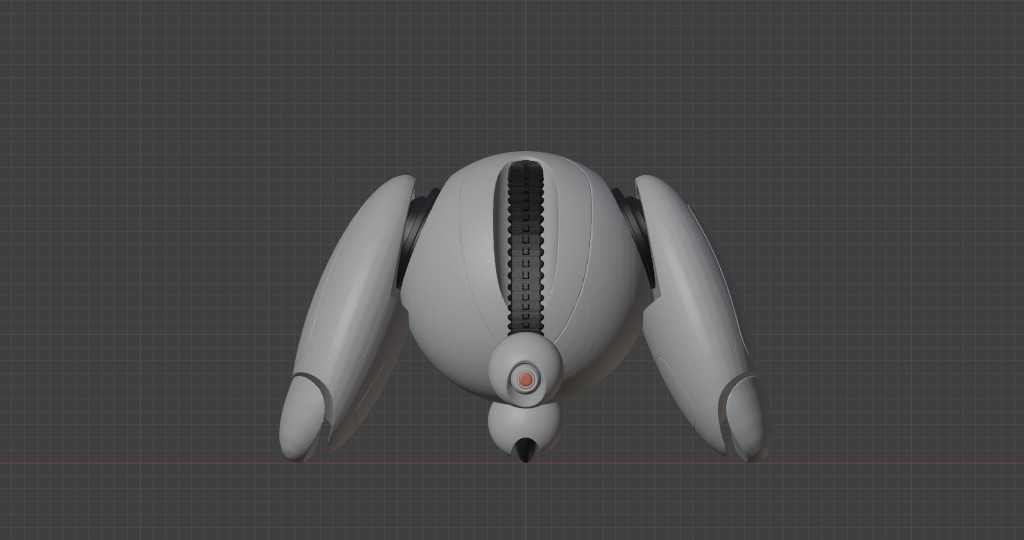
Encounter Robot 3D model, based on simple spheres shapes.
 Before
 After
AfterThe scene, before and after the render. How it looks without materials and light calculations.
The color pallet and shading
The light didn’t take too long to figure it out. Then spend more time in the floor or soil. If you compare the render with the draft scene above, you might notice the stones and detail don’t exist in the actual model. I add all those by material creation. This way I could test features in displacement, or irregularities.
Metallic surfaces, glossy floor, reflections, and some changes of camera-lens focus (blur) are my main elements. Base color palette in cold hue, with few tones in warm colors to contrast and direct the eye.
One more thing, atmosphere!
Then I add some atmosphere to the scene. Atmosphere represents a key component when the artist want to add distance, mood, dimension, depth to a piece.
In nature, in earth or any planet with atmosphere, we can appreciate how objects change in hue color and melt with the back when they are far away from us. On the other hand, we can see objects with vibrant colors, more details the closer they are to us.
Of course, it depends on the artist’s style. For instance, vector designs use high contrast colors and shapes, but don’t need to give perspective or depth sensation to their art, unless the artist has a reason for that. I hope that made sense.
On the other hand, concept illustrators, environmental artist and designers, 3D artist, bucolic painters, among other styles, use atmosphere all the time.
And, one final touch!
At the end, I like to add some touches to the render, like contrast, some aberrations and other minor effects. And that’s it.
Next, you can see a comparison between the render before and after those final touches.
Before AfterWrapping Up!
So, this piece might don’t have a story behind, nor a great work in detail. But, working with it, even just for a test, connect me to a theme I love, and I would like to express more in future work.
If you like it so far, please comment about it, or share it. If you don’t, I’m open to suggestions that help me to create better work.
So, what do you think?
Thank you very much for reading me. Until next time!
P.S. I will mint this work as NFT soon. If you want to check about it, just click the menu link to my Opensea page, or click here.